

Jira Asset Data Manager: A 2025 Best Practices for Setup, Cleansing, and Dashboards
Assets Data Manager in Jira is designed to consolidate, cleanse and reconcile asset data from multiple sources, and setup starts with a job under Adapters that connects an external source. Once the job has run, cleansing rules are set, each column is mapped to an attribute, and the data is cleansed and imported before analysis in dashboards.

contents
This Article aims to show best practices and uses to leverage Assets Data Manager inside Jira.
What does ADM does?
Asset Data Management (ADM) in Jira is a tool designed to consolidate, cleanse, and reconcile asset data from multiple sources, ensuring it is Complete, Current, and Correct. ADM automates data imports, enforces validation rules, and provides insights through dashboards and reports, streamlining asset management and decision-making.
-
Key Features: Data integration, cleansing, and reconciliation.
-
Use Cases: IT asset tracking, inventory management, and data quality assurance.
-
Benefits: Improved efficiency, accuracy, and scalability for managing large data volumes.
Assets
We can access the Asset Data Manager in Jira by clicking the "More" dropdown menu located at the top of the page.
Inside Assets, click on the "Data Manager" option to be directed to a different page. The first step to enable the Asset Data Manager is to create a job, which is a predefined configuration that connects data from an external source.
To do this, go to the left menu on the page and click on "Adapters".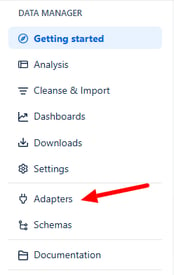
Create a Job
Inside Adapters we will be directed to a different menu: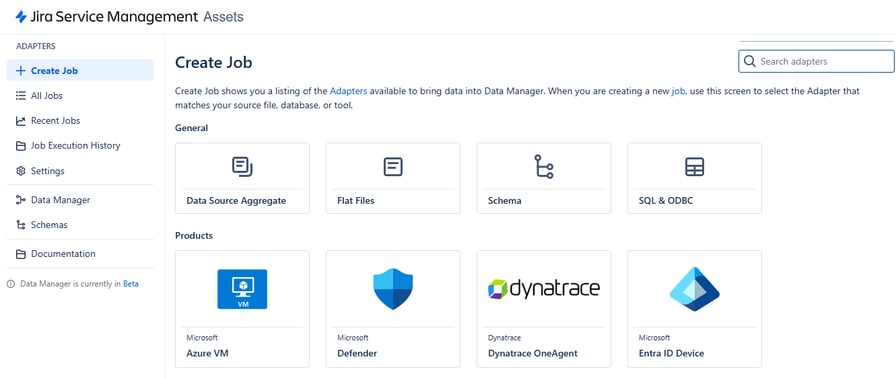
As displayed, we are presented with a list of options for retrieving data, including flat files (CSV, TSV, etc.), an existing schema, SQL, and even products from other suppliers, such as Microsoft Azure.
For this example, we will create a job using a flat file. When selecting this option, a menu will appear on the right side of the screen. We must complete all required fields.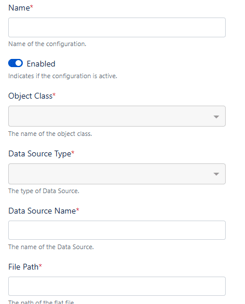
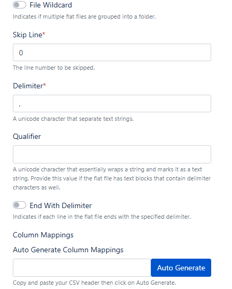
Let’s fill this up:
If a job fails to execute, one possible reason could be an incorrectly assigned data type for a column. Ensuring that each column's data type aligns with the expected format can help prevent execution errors.
We need to name our job and select an object class from the existing ones (Compute, Network, People, Peripherals, or Software). Next, we choose the type of data source, which in this case is CSV, and specify the name of the data source. Finally, we provide the local file path where the CSV file is located.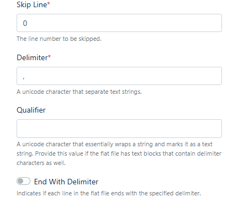
Next, we need to specify where our data starts in the CSV file. Since the data begins on line 1, we must skip line 0. Additionally, we need to define the character used to separate values, which in this case is a comma (,).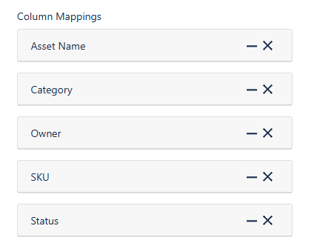
Next, we map the columns of our CSV file in the job so that Asset Data Manager (ADM) recognizes the name of each column and its corresponding data type (e.g., integer, string, boolean). With these configurations in place, we ensure that the job is set up correctly.
Create/host a server
We need a server to support our job. To determine the best server for your database, please refer to the following link provided by Atlassian.
Since we are creating a job from a flat file, we need to download the Adapters Client, which can be found in Atlassian’s Marketplace.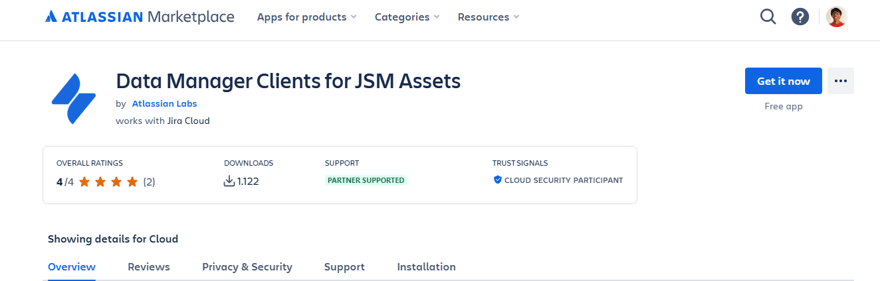
After downloading the adapters, a folder named "data_manager_client" will appear. Inside this folder, you will find different subfolders for each processor type that a computer may have.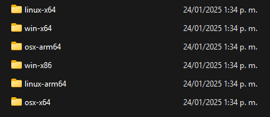
Since the PC we are using runs on Microsoft 64-bit, we need to navigate to the corresponding folder. Inside, we will find both adapters: Cleanse and Import Client and Adapters Client.

To run a job we need our adapter token and workspace ID:
-
How to find our Adapter Token and Workspace ID:
-
From the Jira main page, click on the "More" dropdown list at the top of the page, then go to Assets > Configuration > Data Manager. Scroll down, and you will see the options to "Generate new token" and "Copy Workspace ID."
-
-
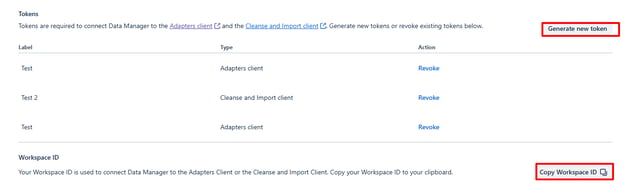
It is recommended to copy those codes and save them in a easy to access place.
Run a job
To run a job we are going to use “Windows Powershell” along with the guide provided by Atlassian, This guide also includes instructions for other operating systems, such as Linux and Mac.
-
Open Powershell
-
Use PowerShell to enter the asset_adapters_client folder, ensuring you run the version matching your PC, in this case, Win-x64. You can navigate manually using commands or right-click inside the folder and select "Open in PowerShell".
-

To run the Job use this template and customize it with your specific values:
.\dm-adapters.exe --run "<myJobName>" --workspace-id "<workspaceId>" --token "<your-Adapters-token>"
-
<myJobName> :Place the name of your Job
-
<workspaceId> :Place the workspaceId
-
<your-Adapters-token>: Place the Adapters Token.
Press Enter

If successful, a message highlighted in red should appear.
Back on the Adapters page, locate the option "Job Execution History."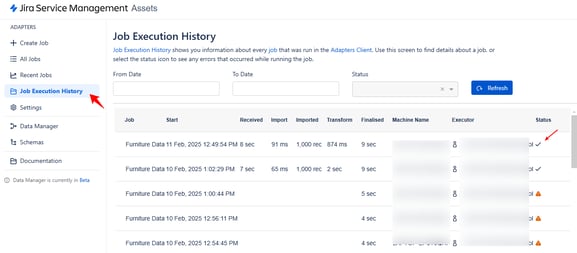
After executing a job, the option to add transform functions is available. This step is optional.
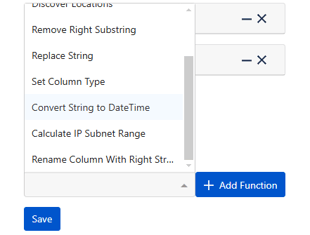
After executing the job, we need to cleanse and map our data.
-
Go to the Option Cleanse & Import.
-
The jobs will be presented and also the status of it.
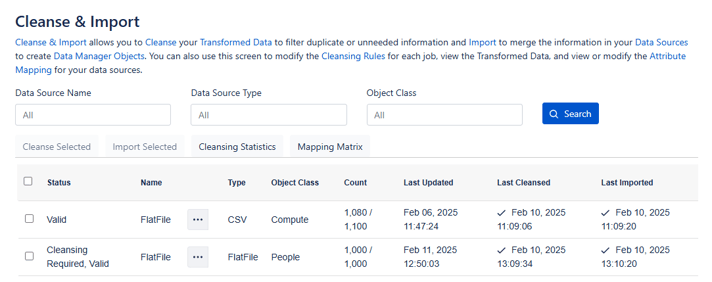
-
First, we need to set the cleansing rules. Click on the meatballs menu located next to the name, then select cleansing rules.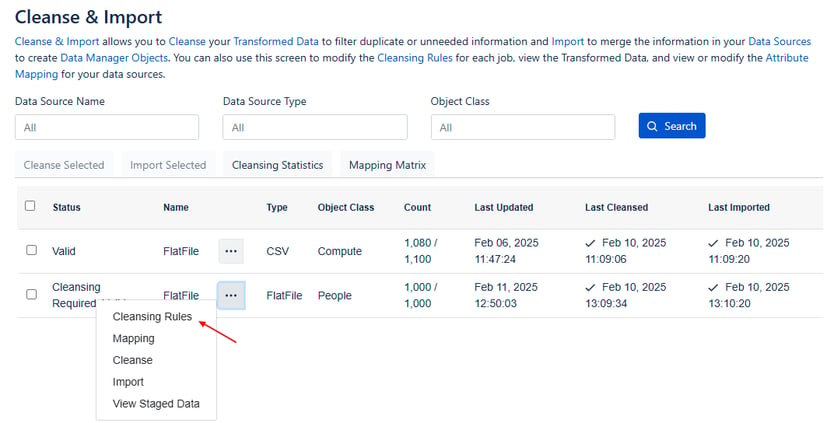
Cleansing Rules
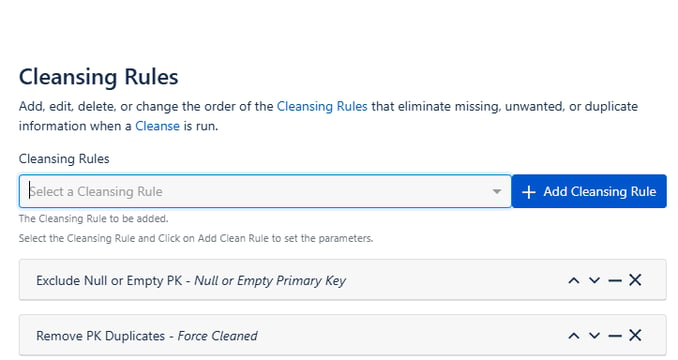
Cleansing rules help eliminate and filter unwanted, missing, or duplicated data.
We have applied two rules: one that excludes null or empty primary keys and another that removes them.
Mapping
We must map each column to an attribute, either by assigning it to an existing one or creating a new one. The data type of each column is indicated in parentheses.
We have decided not to explicitly specify secondary keys.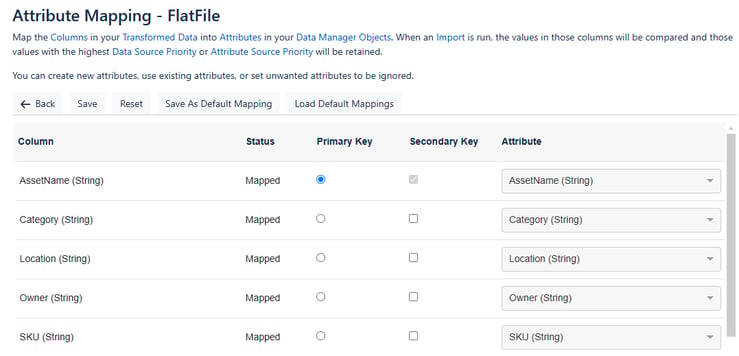
Cleansing
After we’ve mapped each attribute now we must clean the data.
We can see that the first rule was triggered, resulting in the deletion of 20 data lines.
Importing
After cleansing, the data is ready to be imported.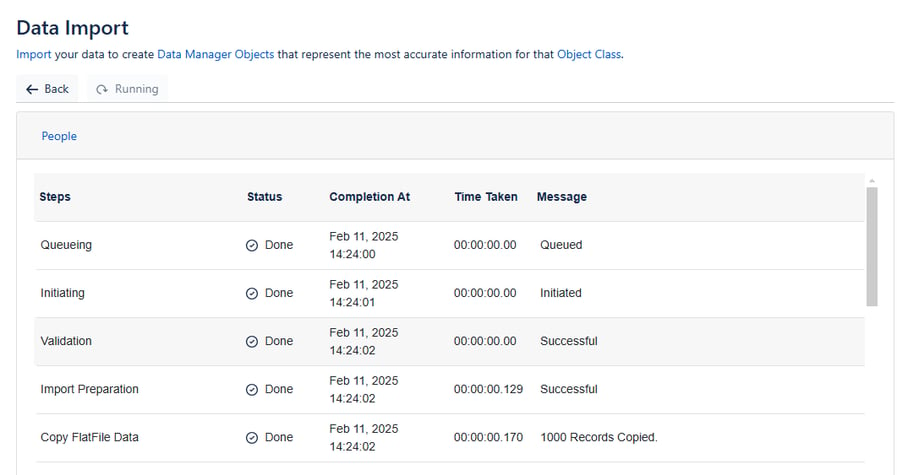
To confirm that each step has been successfully completed, the status will appear as "Valid."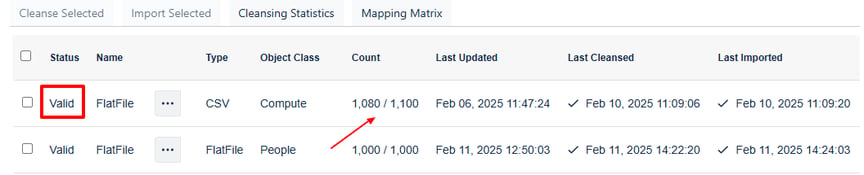
Analysis
After importing the data, we will be able to analyze it.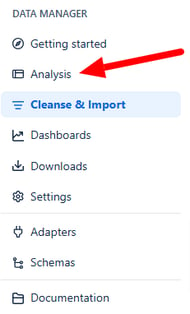
Inside analysis, the object class containing the data will be displayed, as established during the job setup. We click on "Compute."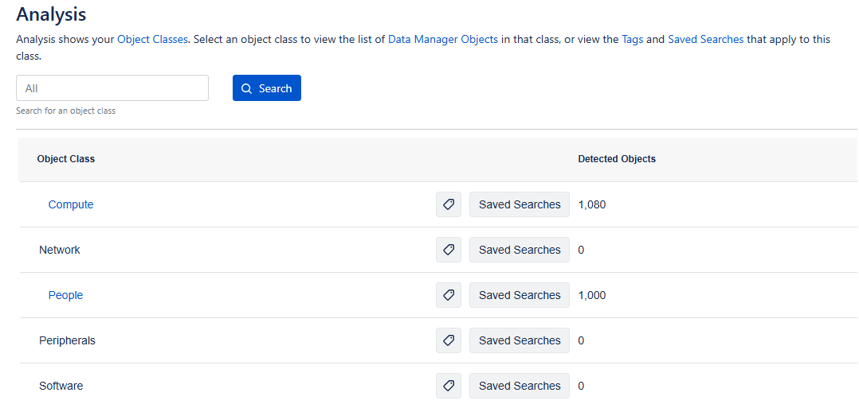
Inside Compute, we can set up an advanced search, which can later be accessed when viewing a dashboard.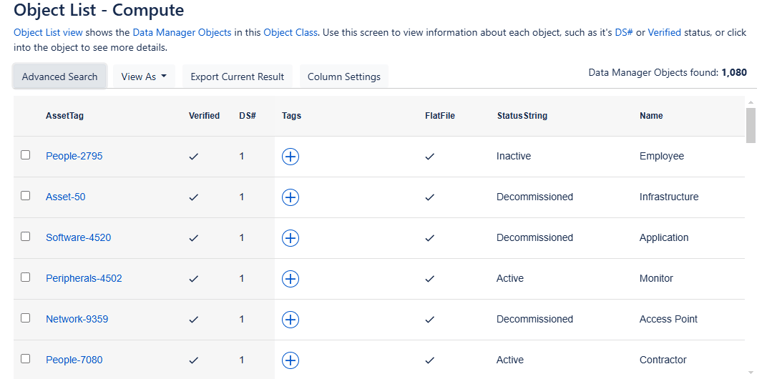
We will set up an advanced search to filter active contractors in our database.
To do this, we create two conditions: the first checks for "Active" in the "StatusString" column, and the second searches for "Contractor" in the "Name" column.
Clicking the search button will confirm that the filter has been applied correctly.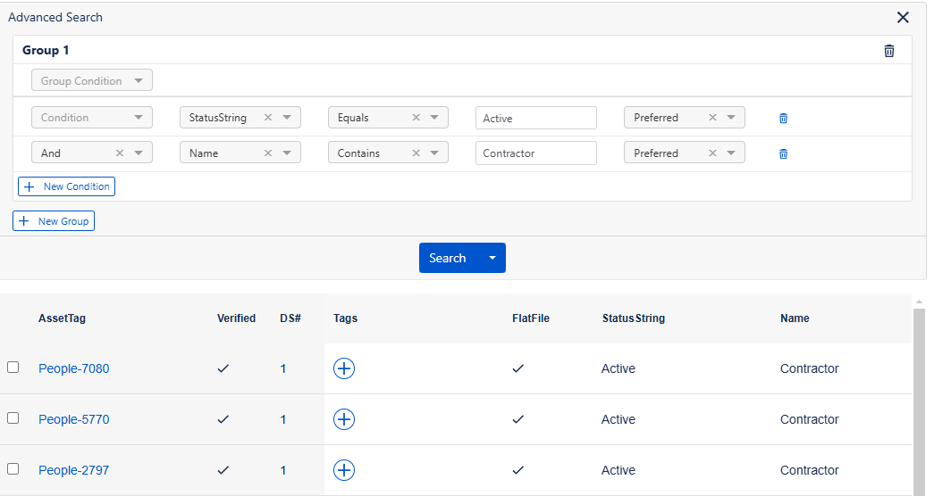
We can save this search and access it later when displaying a dashboard.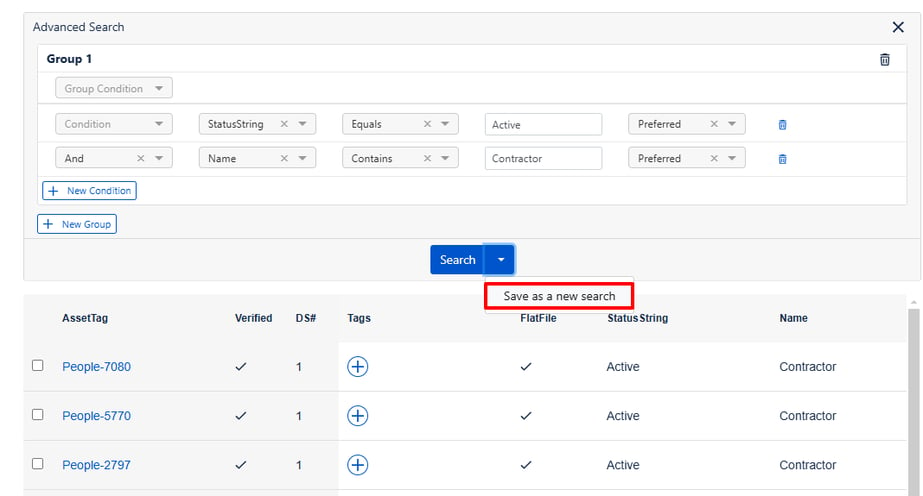
Dashboards
Create a dashboard group named Job 1. To display different dashboards, click on Add.

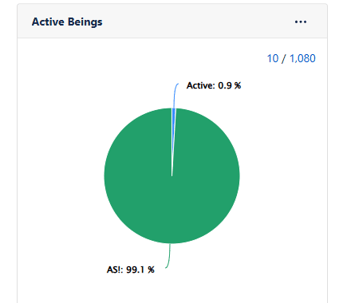
We will create a dashboard that displays the Active Contractors from all active persons in the database.
-
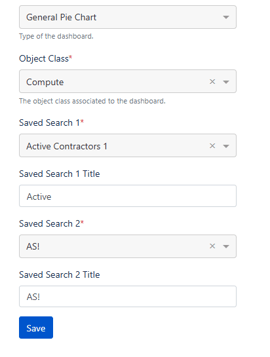
To visualize this, we will create a general pie chart using data from the Compute object class.
-
We will apply our saved search, Active Contractors 1, to filter the relevant data.
-
Additionally, we have created another advanced search that does not filter any data but was set up for applicable purposes.
Display
-
From all our Data, 0.9% belong to Active Contractors
-
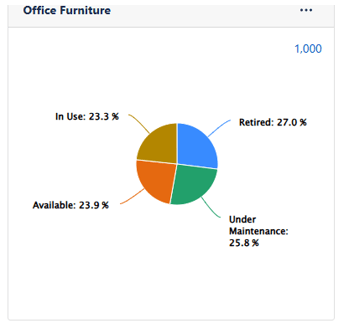
The possibilities are endless. For example, a pie chart can display the status of furniture inside the office, showing how many items are active, in maintenance, or decommissioned.
Similarly, different charts can be created to analyze various data sets, such as device allocation, software usage, or employee asset distribution, making the dashboard a powerful tool for data visualization.
Conclusion
In conclusion, setting up and managing data within Jira Asset Data Manager involves a structured process, from creating and cleansing a job to mapping data and visualizing it through dashboards. By following these steps, we ensure that the data is correctly processed, organized, and easily accessible for analysis.
Advanced search and filtering options allow for precise data retrieval, while dashboards provide a clear and interactive way to monitor key insights, such as active contractors or asset statuses. With proper configuration and utilization of features like cleansing rules, adapters, and visualization tools, Jira ADM becomes a powerful asset for data-driven decision-making.
Important Aspects to take into account:
-
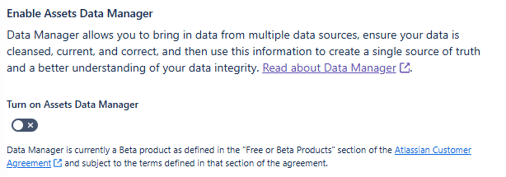
If Data Manager does not appear on assets you must enable it first.
-
Jira>More>Assets>Configuration>Data Manager>”Turn on Assets Data Manager”
-
-
When providing the CSV file in the job, ensure that the path includes the full file name along with its extension, such as ".....Mock.csv".
-
If a job fails to execute, one possible reason could be an incorrectly assigned data type for a column. Ensuring that each column's data type aligns with the expected format can help prevent execution errors.

-
References
Is worth highlighting that Atlassian has made an extensive and useful guides:
Read next.
Change Management in Jira Service Management: A Guide
See how to manage organizational change effectively with Jira Service Management, using proven strategies for lasting adoption across teams
April 16, 2026New Work Types in Jira Business Spaces
Learn how Jira's new work type hierarchy in business spaces gives non-technical teams better structure, and control over their work.
April 16, 2026Web Search in Rovo Agents: What It Is and How to Use It
See how web search in Rovo Agents works, how to set it up, and how teams are using it to bring live web context into their workflows.
April 13, 2026Real-Time Use Cases of Rovo AI in Jira and JSM
See how Atlassian Rovo is changing the way teams work in Jira and JSM in real time.
The blog, weekly.
One email a week with what we published. No drip sequence, and you can leave in a click.